ArtisticWaffle's Art Tips and Tricks

Hello! :wave: Welcome to my art tips and tricks thread! I will be giving some tips and teaching you what I have learned about art. As a disclaimer, I am not a professional by any means, I’m merely someone who has been doing art for a few years and wants to share some tips. None of these are guaranteed to work for you and you don’t need follow everything or anything for that matter.

First, it’s important to find an app that you like and can afford. Some that I recommend are IbisPaint X, Sketchbook Autodesk, Procreate, and Krita. All these are free expect for Procreate which costs a few dollars.

Now that you have an app, it’s time to get started! Make sure to use a good canvas size, at least 1000 pixels by 1000 pixels. For better quality, you can double or even triple this size. Using a bigger canvas means it’ll be less pixelated and you’ll be able to add more details.

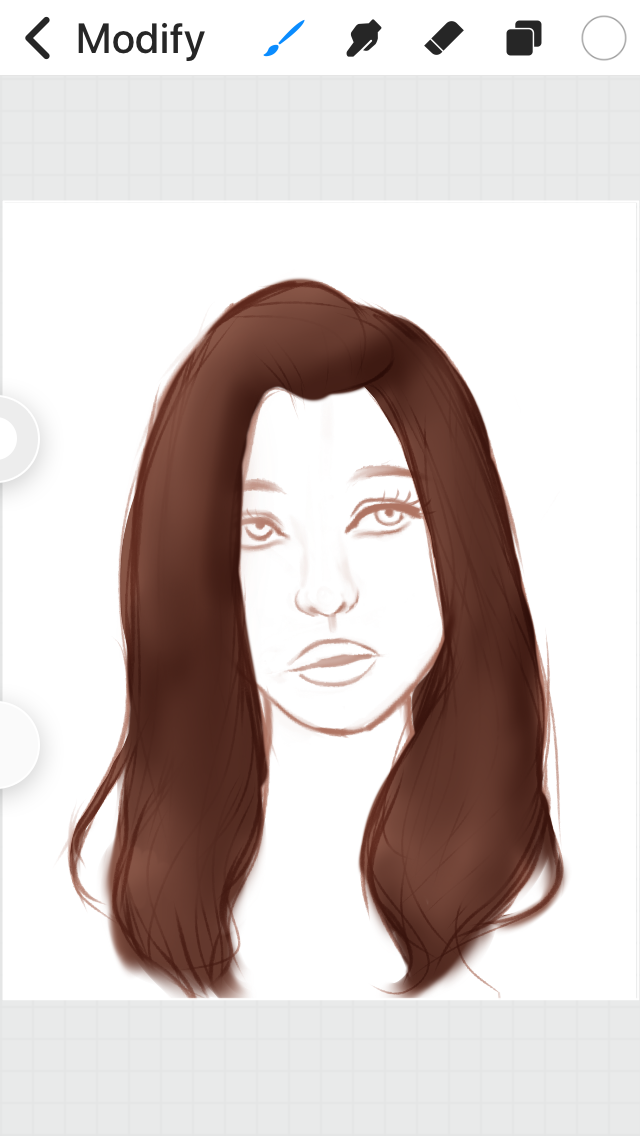
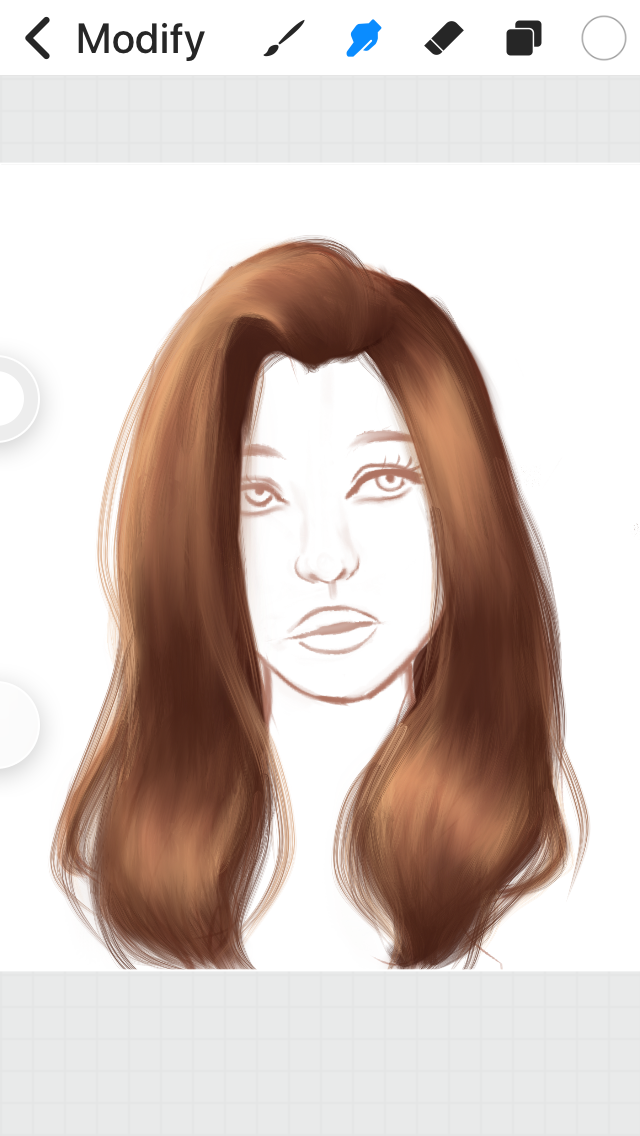
It’s always good to start with a sketch and refine it until you’re happy with it. I don’t really use references, but if you want to go ahead. Just make sure to not copy completely, especially if it’s copyrighted. Using multiple references instead of one can help. Here’s an example of a sketch I’ve done.

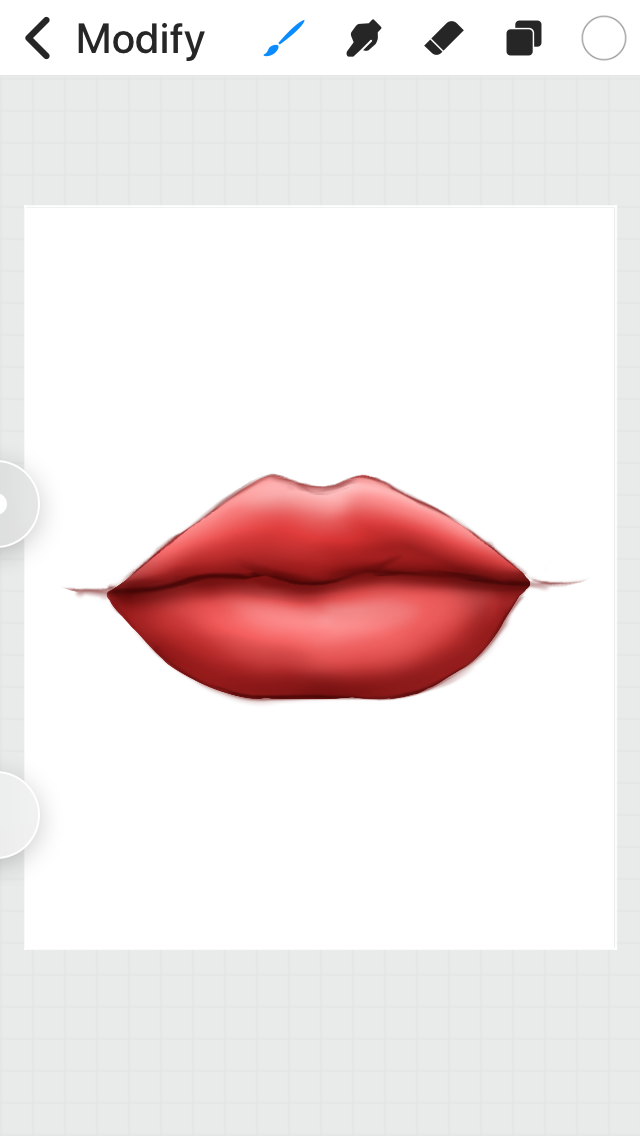
Now that you have your sketch, you can add in your flat colors. I always think about the colors I’m putting down and think of a general color scheme to follow.

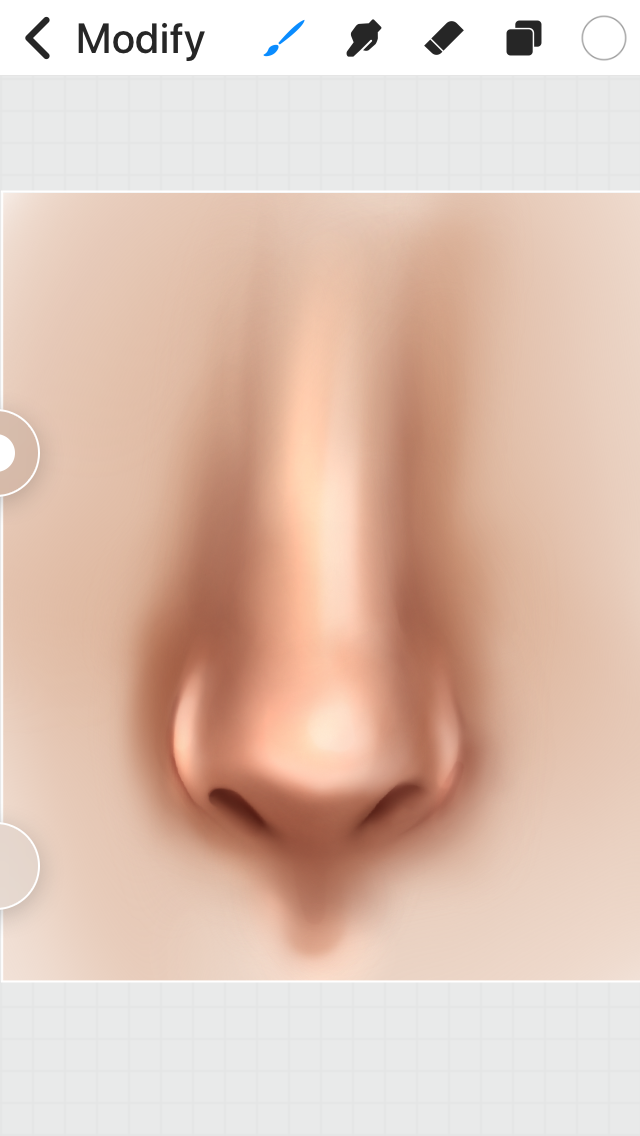
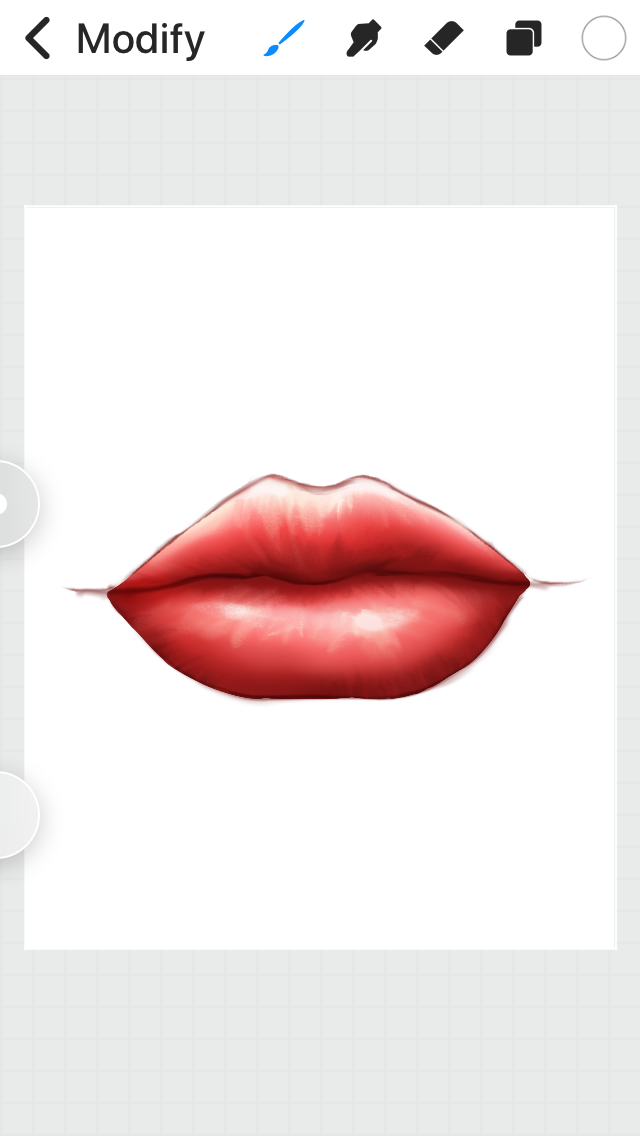
One of the most important things to add is shading and highlighting. This gives your art depth and makes it look more real. I recommend using the multiply layer function to shade. You can even use the same color as the blocked in skin color because the multiply will make it darker. On the other hand, you can use the add layer to add highlights. I don’t recommend shading with black and highlighting with white, but if that works for you, go ahead.

I’m a perfectionist, so I’ve spent nine hours on just one piece before because I was trying to make everything perfect. It’s okay to spend only a few hours on a piece, as long as you’re happy with it. I’ve also realized that if there’s a tiny bit that goes out of the lines, it’s okay. Sometimes it’s better when it’s not perfect.

A lot of people say this, but I’ve found it to be true: practice really does help. Doing something a lot is bound to cause improvement at some point. Just keep working at it and trying new things, and you should improve. Learning the basics of anatomy and what things look like helps a lot too. Try observing things as an artist and think how you could draw it.

Alright, I think that’s it for now! I know I didn’t cover everything, but I can give more in depth advice. Just let me know if you want me to do a tutorial about something and I might do it (if I actually know how). Thanks for reading! I hope this helped! Make sure to never give up and just keep going if this is what you love!

51 Likes

Tutorial time! Here’s a tutorial for how to shade and paint a semi realistic nose. This was made on Procreate, but other apps should work, too.

  1. Get a pretty large canvas (ex: 1500 x1500)

  2. Sketch a really loose sketch to get the shape. It can by messy at this stage. You can use a sketch brush or a pencil brush. It usually works best to use a warm brown or something like that.

  1. Turn the opacity down on that layer and add a new layer. Start drawing the nose more accurately this time, using the sketch as a guide. You can blend as you go.

  1. Keep refining and working on the shape on the same layer until you’re happy with it. Turn off the original sketch layer or even delete it. You won’t need it anymore.

  1. Set the layer you were just working on to multiply. Add a base color layer under the sketch and color in whatever color you want the skin to be.

  1. Using the same color as the base color you just put in, add another layer on top on the base color and beneath the sketch. Set it to multiply and shade where it makes sense with a medium hardness airbrush and blend it out.

  1. Add another layer above it that’s set to add and still using the same color as the base, add highlighting to the nose where it makes sense. Blend it out.

  1. Add another multiply layer between the first multiply layer and add layer of a warmer color, such as a muted red. Shade again and blend. You can also add darker reddish color under the nostrils for more depth.

  1. Add another layer and get a white color ready. Wherever the highlights are strongest, add a white highlight and blend it out. Some places to put this are on the bridge of the nose and the tip of the nose.

  1. Add another shading layer to make the shadows a little bit darker. You can use a really soft airbrush for this.

  1. Add a new layer, set it to color dodge and add some red or pink with a soft brush to give it more life.

Alright, that’s it! That’s one way to shade a nose. There are obviously many more, so use what works for you. If you want to follow along with the tutorial, feel free to post your results here. I hope this helped! :heart:

23 Likes

I have another tutorial! This time it’s a lip one. I’ve struggled a lot with lips, so this isn’t perfect, but hopefully this helps anyway.

  1. Get a pretty large canvas ready (at least 1500 x 1500).

  2. Sketch out your lips with a darkish reddish color. Use a pencil brush or something that you like to sketch with. Mine is really messy at this stage, but that’s okay for now.

  1. Turn the opacity of that layer down to about 50 percent and add another layer. On this one, start refining the lips, flipping the canvas frequently to check for mistakes and symmetry. You can use the same color as before. Turn this layer to multiply. (You can delete or hide the original sketch now)

  1. Add another layer under the second sketch you just did and use a hard brush to color in the base color of the lips. Pick a color that you would like them to be and color in the whole flat color.

  1. Add another layer above this one and set it to multiply and select clipping mask so you won’t go out of your base color. Use a softer airbrush to shade where it makes sense and blend as you go using the same color as the base color (the multiply layer will make it darker).

  1. Add a layer above this and set it to clipping mask as well and set it to add. Highlight the lips where it protrudes the most, still using the same color.

  1. Next, add another multiply layer on top of the previous one and darken up the shadows, especially on the very bottom and where the two lips meet.

  1. Add another layer and use a light color, either yellow or something or just a lighter version of the original color (I used light yellow here). Use a textured brush and add texture and blend. Also do the same with a dark color where shadows are.

  1. Add a new layer and use white to add some more extreme highlights. Blend them out.

  1. Last step! Add some color dodge on a new layer and use a soft airbrush and the main color of the lips.

That’s it! I hope that this tutorial has been helpful to your lip drawing. As I said last time, make sure to show me your results if you decide to try them yourself. Thanks for reading! Good luck!

23 Likes

THE TALENT. Wow, this is truly amazing. Nice work!

5 Likes

Thank you! I tried :relaxed:. I hope it helped!

3 Likes

Holy moly lemme put this thread on watching

4 Likes

This is AMAZING!! Thank you for sharing! :sparkling_heart:

2 Likes

Thank you! I’ll try to update it again soon, so let me know if you have any requests :wink:

2 Likes

Thank you! I’m glad you like it! :smiling_face_with_three_hearts:

2 Likes

Hair please if you could :clap:t5::clap:t5::eyes:

I love the way you do it!

3 Likes

Thanks sure thing! I’ll do hair whenever I get a chance :blush:

3 Likes

Oh my gosh thank you! :pleading_face: It didn’t really hurt lol :joy:

2 Likes

As requested by @Turtle_Cat, here is a tutorial on how I paint hair. Once again, this is just how I do it, not the only way.

  1. Get a pretty large canvas ready (at least 1500x1500).

  2. Sketch out your character and the general shape of their hair. I prepared a sketch without recording how because the sketch isn’t the important part of this one. Set the layer to multiply. Sorry for the rushed sketch, I hope you get the idea anyway!

  1. Fill in the hair with the main base color without any shading on a new layer underneath the first one. Use the same color and use a soft airbrush to block in the shadows. Set the layer to multiply and blend it out. Most layers from here on out can have a clipping mask set to the base layer so you don’t go out of the lines.

  1. Add a new layer above the previous one and set it to add. Using the same color and brush as before, block in the highlights and blend.

  1. Add another layer and use a brush that has some hair like strokes. On Procreate, I use Acrylic. Eye drop the colors and make them a little lighter and darker than the highlights and shadows. Follow the flow of the hair. Blend it a little with the same brush to be consistent. Add some strands and make the shadows darker and highlights lighter.

  1. Add another layer and repeat a process similar to step 5, but this time with a more hair like brush. I use brushes that @keiji gave me to use. Thank you! I use a hair one and add more detail and refine what I already have. You can blend this one a little too where you see fit.

  1. Add another layer and use the same brush to add little strands that don’t quite stay put for a little more realism. Keep eyedropping colors and adjusting as needed. Make sure your clipping mask isn’t on this layer.

  1. This step is optional. If you want to add some light to your drawing, take a light color, such as yellow, and either make the layer add or use a luminance brush to add light to the hair coming from the light source. Blend it out.

That’s it for this tutorial! Let me know if it helped you and feel free to try it out yourself and show me what you do! I hope you enjoyed! :heart:

22 Likes

Omg this helps SO MUCH I’m gonna try this style with my next edit thank you!!

2 Likes

Yay! Thank you! I’m glad you like it :heart:

2 Likes

Do you by any chance know which brushes to use for hair in autodesk sketchbook? :sweat_smile: And what do those modes like ‘multiply’ and ‘add’ actually do? Nevertheless you are really talented, I love your work!

4 Likes

Adding this: How did you get this good at just the anatomy? I struggle with making things seem realistic, especially the head shape is giving me problems for some reason.

4 Likes

It’s been awhile since I’ve used Autodesk Sketchbook, but I recommend anything with a bristle, such as one of the synthetic bristle brushes. Sorry if these don’t work, I’m not entirely sure. As for add and multiply, add makes it a color lighter and multiply makes it darker. They’re very useful.

4 Likes

Thank you! I’ve been drawing to improve for about three or four years, so I’ve picked up on some anatomy over time, but I’m still far from perfect. I recommend a lot of practice and try to make the head small, but not too small and not completely round. I usually start with a circle and add on a jaw, which makes the head a more realistic shape. Try looking at people around you and consciously try to think about their anatomy and how you would draw it. Try drawing from copying a reference. This will teach you what real anatomy looks like. Find artists that you like and who inspire you and study their work and try to learn from them. Practice a lot and try comparing your anatomy to your own face. Are the eyes bigger on my drawing than they are on my face? Does this nose resemble mine? Are the lips the right size and shape? Asking yourself these questions might help. Well, I hope that something I’m here helps! Make sure to never give up and remind yourself that you’re better than you were before :relaxed:

4 Likes

Okay, thank you so much for your quick answers, your advice is very helpful!

3 Likes