Sorry for tagging but can you guys vote 
6 Likes
Bump 
4 Likes
I did. Thank you sm for the tag:)
5 Likes
Done voting. It’s at 8 now.
4 Likes
A 50/50 vote 
3 Likes
Yep 
3 Likes
I guess I’ll do eyes first since those are simple and then shading 
4 Likes
Bump 
1 Like
Hey girl, when you get a chance, do you think you could do a tutorial on hair colouring? I keep looking at youtube videos but my drawings still end up looking like sh*t lol
2 Likes
Sure I’m not the greatest but people seem to like the way I do hair 

2 Likes
Yess, i’ve seen your art work and GIRL YOU ARE CRAZY TALENTED!!
2 Likes
Aw thank you 
2 Likes
Bump If things go accordingly I should have time to make at least one tutorial tomorrow.
4 Likes
Bump Is this style of eye alright for a tutorial or would a simpler style be better?

- Style In Photo
- Simpler Style
0 voters
The tutorial shouldn’t take that long to make since I’ve been practicing.
4 Likes
Bump I’ll start typing up the tutorial. Bare with me, I’m terrible at explaining things
4 Likes
So to start off I’m using IbisPaint X, I’m not that experienced in other apps so I won’t be much help if you don’t use IbisPaint but I can try
If you don’t know how to turn on stabilizer
Press the finger button and change your settings to look like what’s shown in the picture

The first thing you do is choose a base color.

From there you add a layer and use one of the darkest shades of that color for the pupil.


Once you do that add another layer between the pupil and base color. You’ll press the clipping button and change the layer to add. If you don’t know how to do that just press the button I outlined in blue on the bottom right and scroll until you see “Add”.

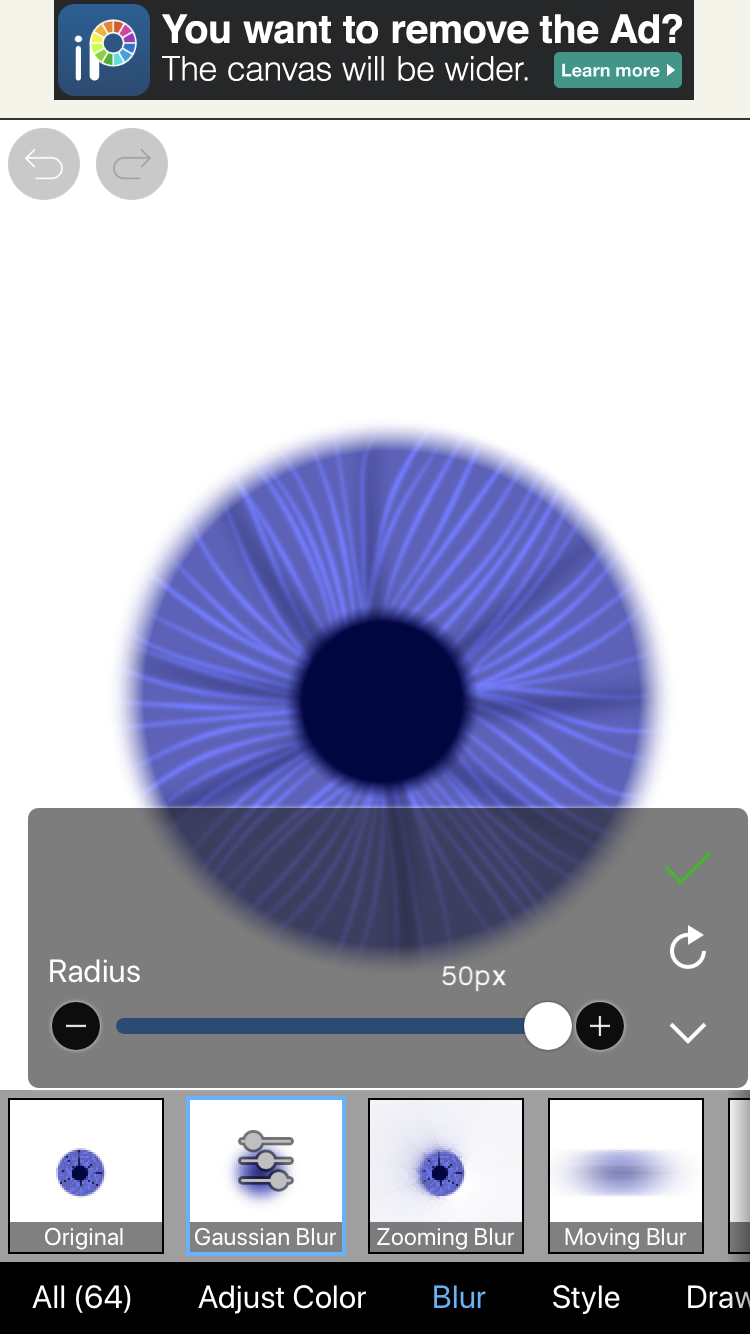
Using Dip Pen (Soft) (change it so that the brush is smaller) and stabilizer go around and make a bunch of lines. Perfect explanation Once you’ve done that slightly blur it with Gaussian Blur.

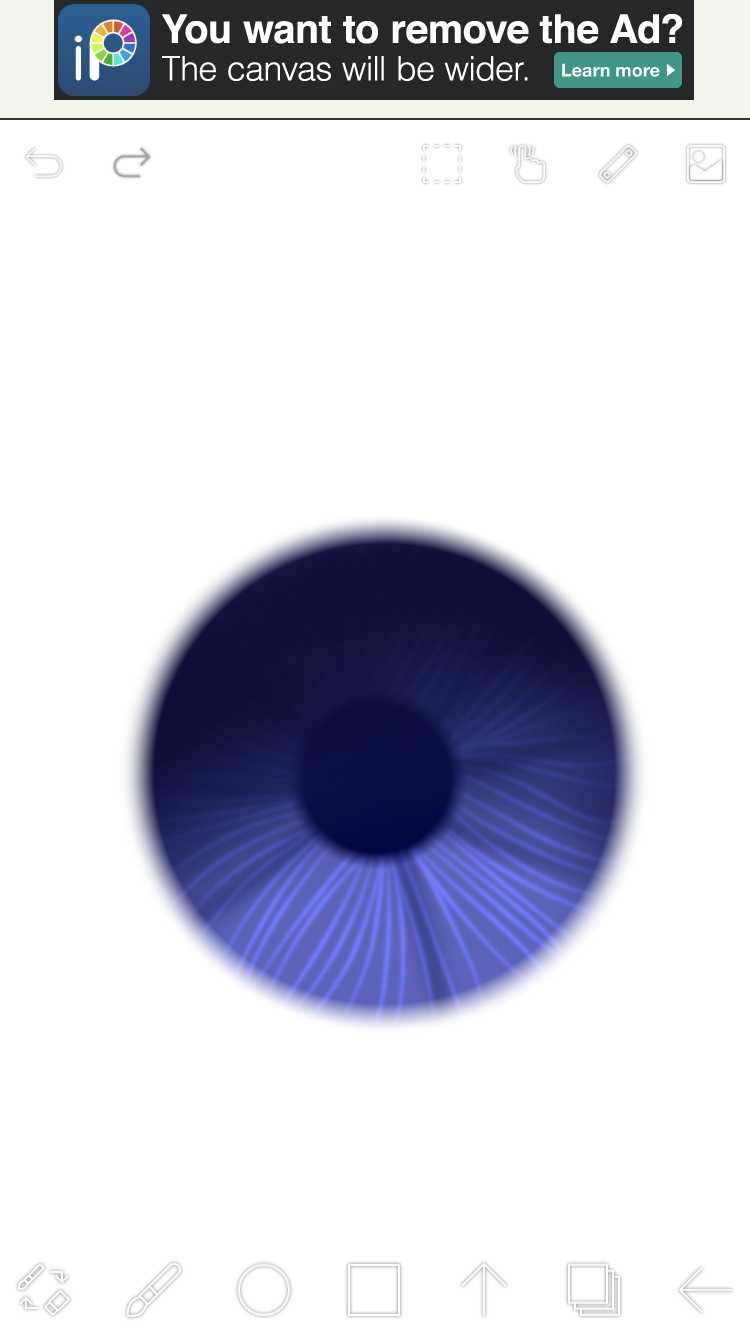
The next step is to merge the layer with the lines and the base. With the button circled below.

Then you’ll make a new layer and clip that to the base. Using a darker color you can just make a few slightly thicker lines and blur them too before merging. If the color is really dark you can just blur it at the maximum. Now you can merge all the layers together.
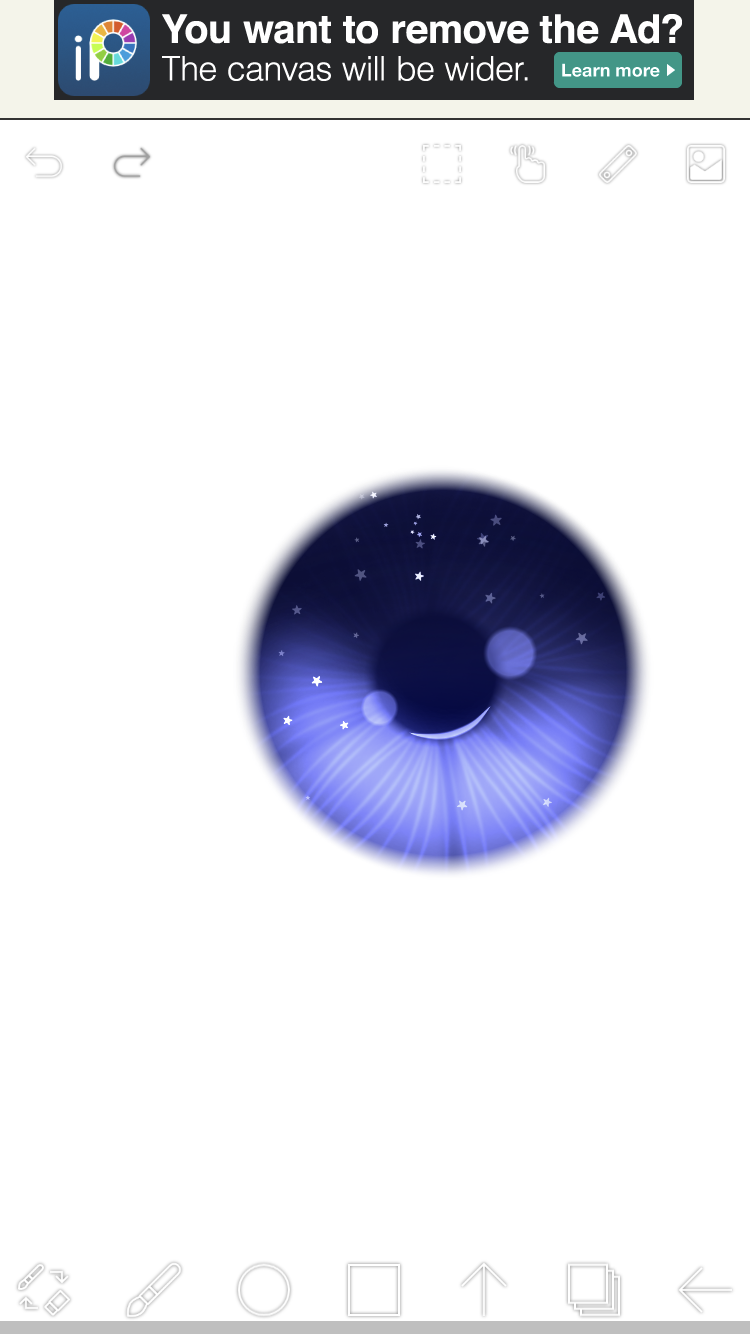
Add another layer, clip it, and you can use the color of the pupil and Airbrush (Triangle) to start shading in an arch shape. The closer you get to the top the darker the color you’re using to shade should be.
Merge, add layer, change the layer to Add and using a lighter color start to lighten the bottom of the eye in an upwards arch. It should look somewhat like this ![]()

Merge and create a new Add layer and using the brush Felt Tip Pen (Soft) you can change the brush size and opacity to add two white dots. One on the bottom of the eye and one on the opposite top of it. You can also use Dip Pen (Soft) to add a white curved line at the bottom of the pupil.
You can search for one of the sequin brushes and use it to decorate the eye. I used Sequin Pen (Star) You don’t have to pay to use this brush, just watch an ad.
Here’s the final result
I know I’m not the best at explaining so you can ask me to clarify anything
If you’re using this for an art piece it’s best to draw the eye on that canvas instead of uploading it and resizing it into the piece!
28 Likes
this was very helpful 
4 Likes
I’m glad I felt like it made no sense whatsoever
3 Likes
it does!!!
3 Likes
Eye outlining tutorial next or hair?
- Eyes!
- Hair
0 voters
3 Likes